Haley Bell at Home

  • Recipes
  • Entertaining & Decor
  • Living
  • About

Easy Dessert: Pots De Creme

February 25, 2016 by Haley Bell in Dessert

It is no secret that I love to entertain! It is also no secret that I love watching the Academy Awards every year. I watched them with my mom and sister growing up, and now my husband and I are all about it. We try to watch as many of the best picture nominee films leading up to it because we like to fill out ballots with our predictions. I love to find food that feels "Oscar worthy", yet is simple to make. For our viewing party this year, I made these incredibly easy yet delicious dark chocolate pots de creme. They are the perfect dessert for entertaining, watching the Academy Awards, or just because!  

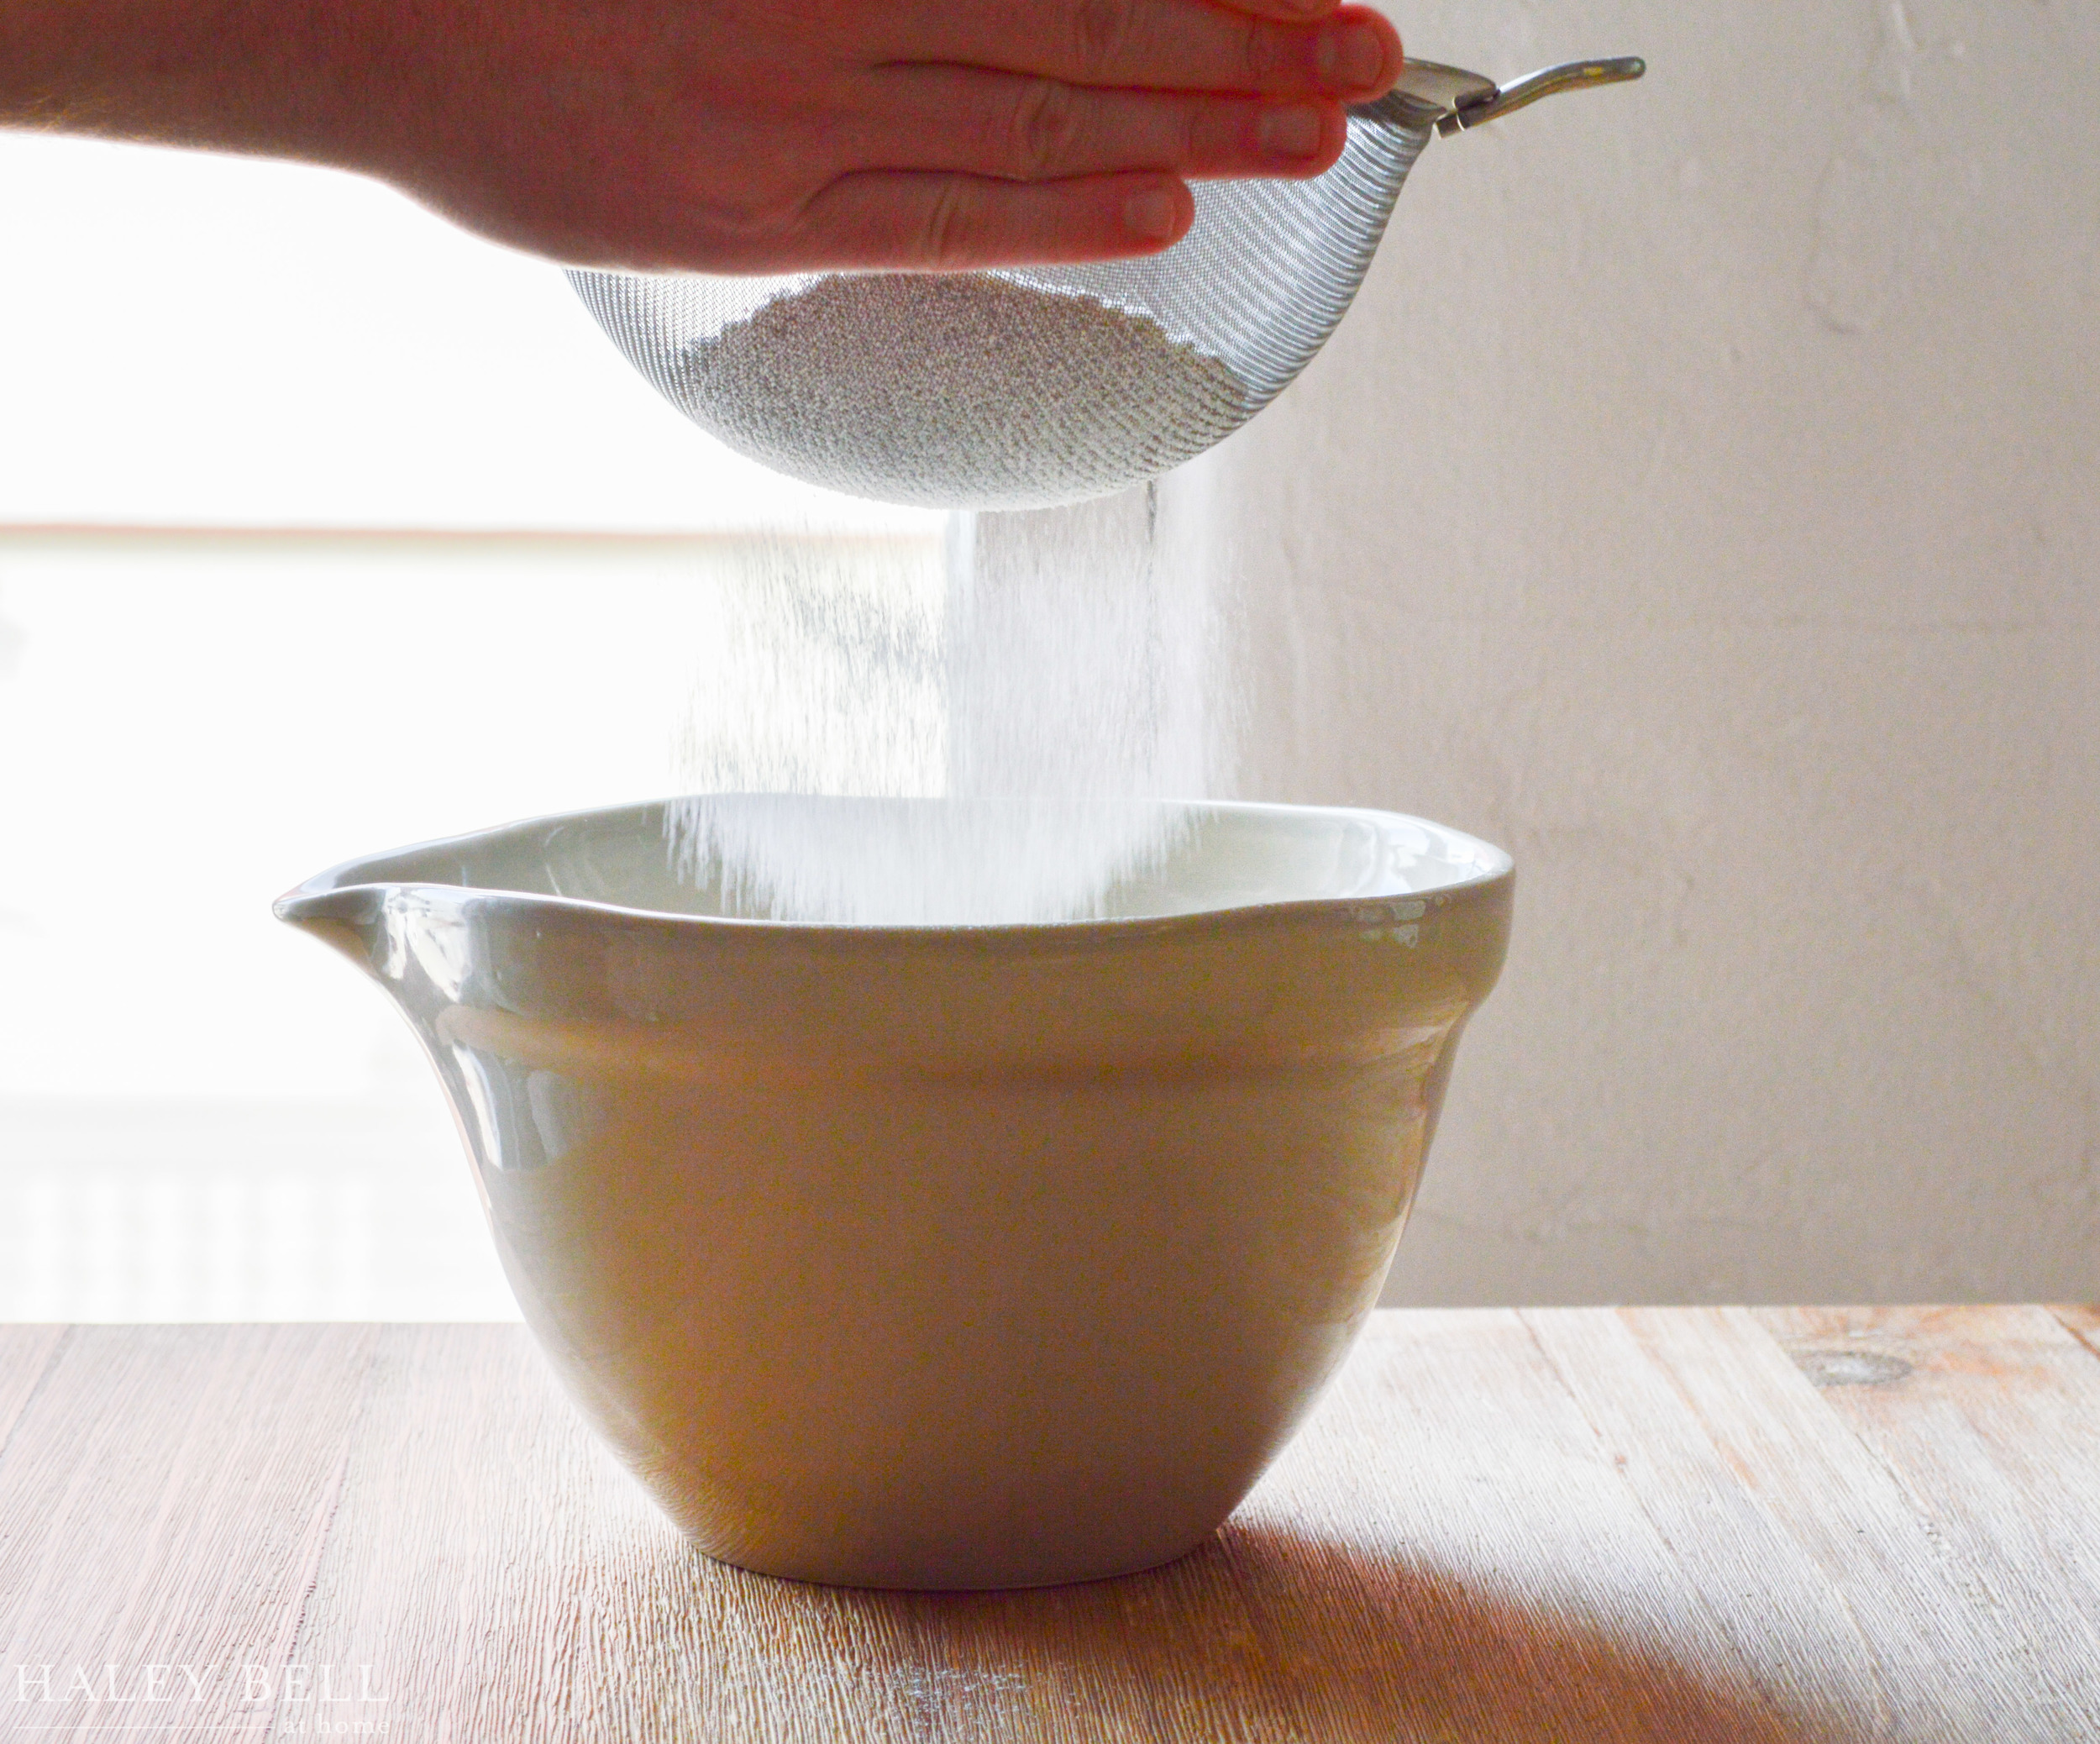
This recipe requires very little prep work and comes together really quickly. It is naturally sweetened with honey so there are no refined sugars (which is always a plus!). I did a rough chop of a 4 oz. unsweetened chocolate bar and then threw the chocolate and the remaining ingredients in a high powered blender until smooth. Unlike traditional pots de creme, you do not have to use a double boiler to melt the chocolate. You warm up the coconut milk and pour it over the chocolate mixture, which makes it all come together.

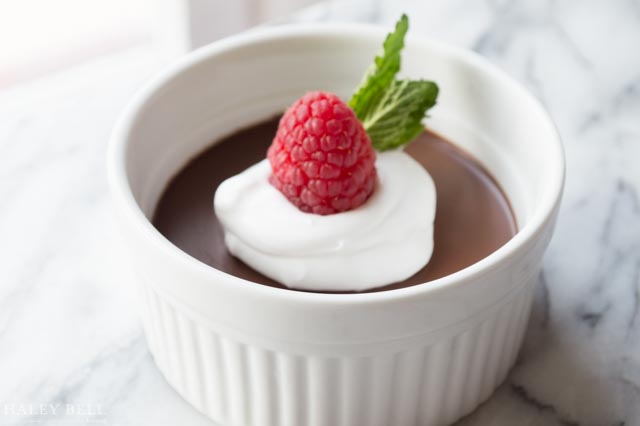
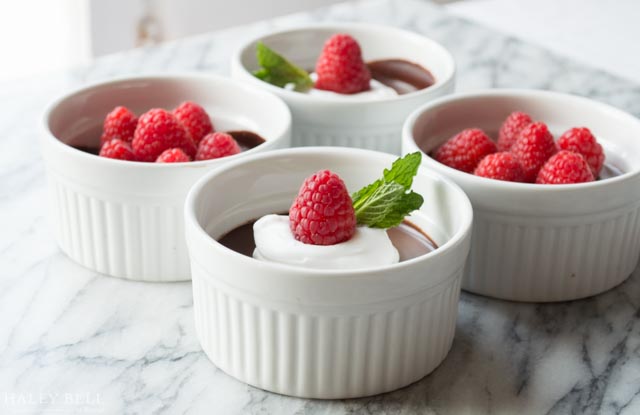
Honestly, the hardest part about this recipe is waiting for it to cool in the refrigerator! Once it has cooled for at least 2 hours, it turns into the most delectable, rich chocolate dessert. Since I wanted to impress our guests, I added some fun toppings but you could certainly eat it as-is. 

I made an easy coconut whipped cream to put on top with the leftover coconut milk and it was a really nice addition. I also topped them with some raspberries and mint, but you could top them with anything you have on hand.

This dessert also fits most dietary needs since it is gluten-free, dairy-free, grain-free, and refined sugar-free. However, it is not free of flavor!

I would love to hear how you like this recipe, so be sure to comment below! 


Pots De Creme Recipe

Ingredients:

  • 2 eggs
  • 1/4 cup honey
  • 1 tsp. instant espresso powder (optional)
  • 1 tsp. vanilla extract 
  • 4 ounces chopped unsweetened chocolate 
  • 3/4 cup coconut milk (I used the Trader Joe's brand- extra thick)
  • Optional toppings: whipped coconut cream, 1 pint of raspberries, and mint

Directions:

  1. Roughly chop up the 4 oz. of chocolate.
  2. Add all of the ingredients, excluding the coconut milk and optional toppings to a high powered blender. Blend until smooth.
  3. Heat the coconut milk in a sauce pan until very hot (but not boiling). 
  4. With the blender running on low, carefully and slowly add the hot coconut milk into the blender. Blend until the chocolate is completely melted and the mixture is smooth and thick. 
  5. Pour the chocolate mixture into serving cups and refrigerate until set, about 2 hours or over night. 
  6. Top with your favorite toppings and enjoy!

*This recipe is adapted from this original recipe

February 25, 2016 /Haley Bell
Chocolate, paleo, Dessert, coconut
Dessert
Comment

Chocolate Chip and M&M Cookie Bars

December 09, 2015 by Haley Bell in Dessert

During the holiday season it is so easy to let the stress of it all take away from truly enjoying it. This year I am focused on simplifying my approach to the holidays from our decorations, to the gifts and everything in between. One way I am simplifying my gifting is by only baking one recipe that I can give out to most everyone. My chocolate chip and M&M cookie bars are the perfect option because you can individually wrap them and they are incredibly delicious! 

This past weekend my husband helped me prepare a pan of these cookie bars and we packaged them up to give out as gifts. I love about having him in the kitchen with me because it is always way more fun! Flour ends up all over the place, and the end result always tastes better knowing how much fun we had preparing it. In this case, he started by sifting all of the dry ingredients while I handled the other ingredients. 

I like to use equal parts of three different kinds of chocolate in these bars: milk chocolate chips, bittersweet chocolate chips and of course, M&M's. You could also substitute nuts in but if I am making these for a crowd I like to stick with chocolate to avoid any nut allergies. 

Once the cookie bars have cooled completely (I like to cool mine overnight), I cut them into individual servings to package them up. 

We made our gifting list and got out our favorite packaging supplies. I love to use these gift pouches, baking twine, gift tags, and a little sprig of greenery. You could also use these bags. If you use cotton bags, be sure to individually wrap the cookie bars in plastic wrap first so they stay fresh. 

We hope you enjoy a holiday season filled with laughter, joy and these amazing chocolate chip and M&M cookie bars :)


Chocolate Chip and M&M Cookie Bar Recipe

Ingredients:

  • 2 1/4 cup all-purpose flour

  • 1 Tsp. baking soda

  • 1/2 Tsp. salt

  • 1 cup (2 sticks) butter, brought to room temperature

  • 3/4 cups granulated sugar

  • 3/4 cups light brown sugar 

  • 2 Tsp. vanilla extract 

  • 2 eggs, brought to room temperature

  • 1 cup milk chocolate chips 

  • 1 cup bittersweet chocolate chips 

  • 1 cup M&M's 

* Can also substitute 2 cups of chopped walnuts or pecans for the milk chocolate chips and M&M's

Directions:

  1. Preheat the oven to 375 degrees. Grease and flour a 9x 13 in. pan. 

  2. Sift together the flour, baking soda and salt.

  3. Beat the butter and sugars together with the vanilla extract. Beat in the eggs. Stir the flour mixture, and chocolate into the mixture until combined.

  4. Spoon the batter into the prepared pan. Bake 25 minutes until golden brown. Remove from the oven and let them cool completely. 

December 09, 2015 /Haley Bell
Dessert, Chocolate, chocolate chip, Cookies, Cookie Bars, M&M, Christmas, Christmas Gift
Dessert
2 Comments

Mini Funfetti Cake

July 31, 2015 by Haley Bell in Dessert

If you follow me on Instagram, you know that last week was my Husband's Birthday, which in our house means lots of Birthday cake! The running tradition in the Bell family is for my Husband's Grandma to bake a yellow cake with homemade chocolate frosting. And, the running joke is that her frosting is simple yet no one can replicate exactly how she makes it. This is the 8th Birthday that I am celebrating with my husband, and that means 8 tries at his Gramdma's cake. Since we don't live close to family, and I still haven't been able to nail it just right, I decided to save myself and make an incredibly easy (and cute) alternative. A mini funfetti cake! 

BirthdayCake-2.jpg
BirthdayCake-3.jpg

Another motivation for making a mini cake was because we were leaving the next day to go out of town for a couple of days. And, who doesn't love their own personalized cake for their Birthday? 

Are you ready for the incredibly easy directions? Mix 1 box mix of funfetti cake according to the box directions, grease an emptied soup can with baking spray and pour the cake mix into the soup can filling it halfway (I filled mine 3/4 of the way since I wanted a taller one). Put the filled cans on a baking sheet and place in the oven at 350 degrees for 30 minutes. Once they are fully cooked through, remove them from the oven and let them cool completely. 

Once the cake has cooled completely, run a knife around the edges and carefully release it from the can. Using a serrated knife, cut the cake into 2-3 layers (depending on how large it is) to frost it. Mix the sprinkles in with the funfetti frosting and frost away! I chose to do mine "naked" style leaving the sides exposed, but you could certainly cover the whole thing in frosting. 1 box cake mix yields about 4 cakes, depending on how much batter you pour into each. 

This Birthday was incredibly special and it made me realize that it's not always about how many hours you spent in the kitchen preparing. Be it from scratch, a box or a bakery. What really matters is feeling celebrated and being together. This year I focused on that, relieving myself of the pressure of making his Grandma's cake, and maybe even starting our own tradition (we'll see!).  

Sources:

Mini white cake stand: Rosanna


July 31, 2015 /Haley Bell
Dessert, Funfetti, Cake, Birthday, Birthday Cake
Dessert
4 Comments