Haley Bell at Home

  • Recipes
  • Entertaining & Decor
  • Living
  • About
Tablepic-21 (1 of 1).jpg

Simple + Easy Fall Tablescape

November 12, 2019 by Haley Bell

It feels as though Halloween hit and then Christmas decor appeared! But what about fall decor? And what about Thanksgiving? I love to entertain, and this time of the year is no exception, so I wanted to share a recent simple and easy fall tablescape I put together. It is so easy recreate this look, using whatever you have on hand, or I also linked the sources for this look below.

Tablepic-11 (1 of 1).jpg
Tablepic-9 (1 of 1).jpg
Tablepic-2 (1 of 1).jpg

The color palette I used was a little non-traditional with neutrals in shades of grays, black, white and taupe. While I appreciate the traditional colors of the fall season, I love to mix it up!

Tablepic-14 (1 of 1).jpg
Tablepic-10 (1 of 1).jpg

There is truly nothing more that I love than gathering around our table for a meal with family and friends. It is one of my favorite places to create memories!

If you are looking for an easy fall tablescape, below are all of the sources to recreate this affordable and easy look!

  • Black Plates (dinner plate size sold out)

  • Black Candle Holder

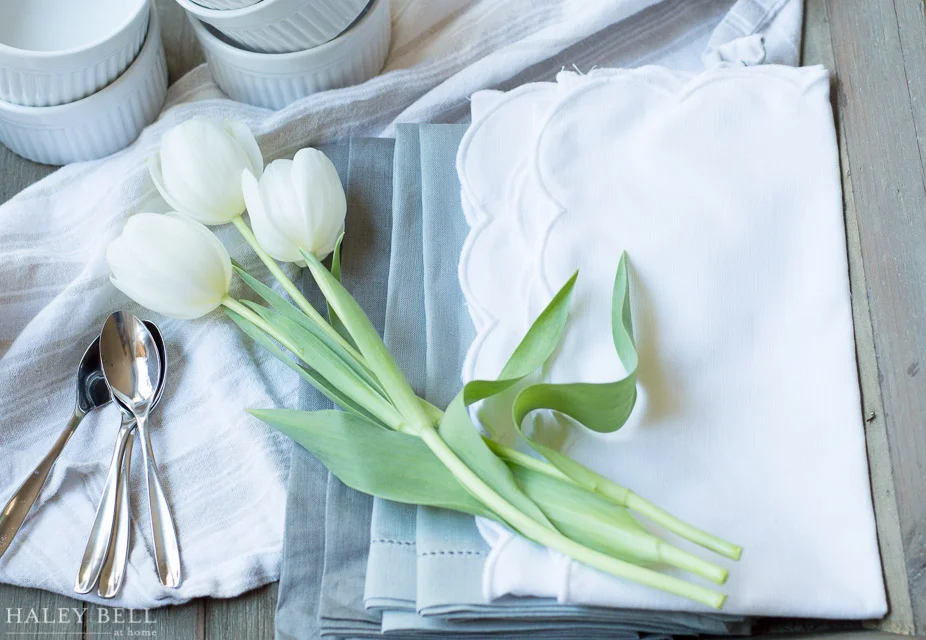
  • Gray Linen Napkins (similar)

  • Velvet Pumpkins

  • Candlesticks

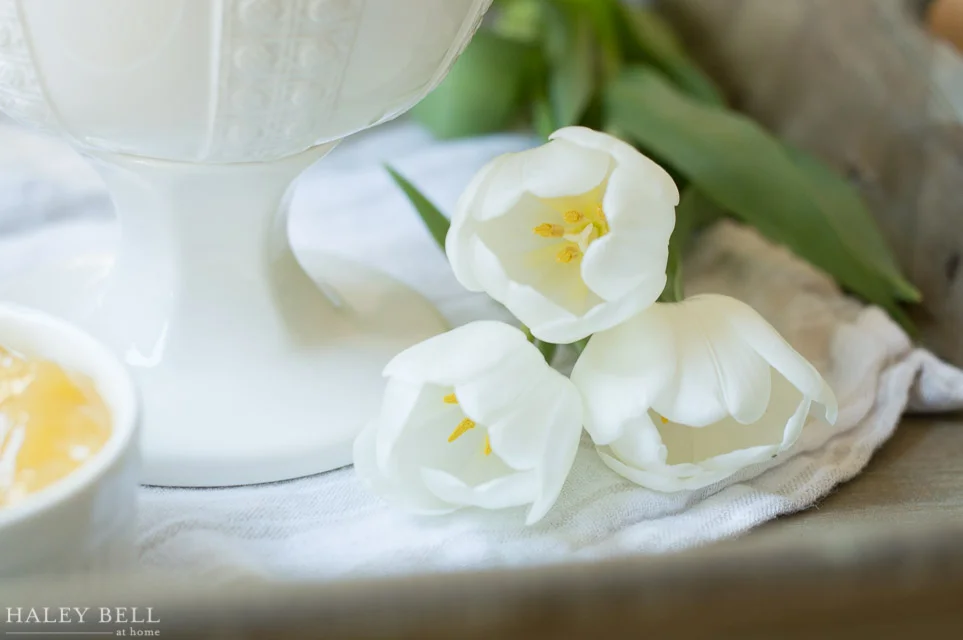
  • I also used real white pumpkins, and greenery from my backyard

November 12, 2019 /Haley Bell
Comment

Meyer Lemon Yogurt Bar & Grain-Free Granola Recipe

March 06, 2017 by Haley Bell in Entertaining, Recipe

Almost two years ago I traveled to Seattle, WA to attend the Sinclair and Moore floral design workshop. Each morning we were greeted with a yummy yogurt and granola bar which left a lasting impression and inspired me to recreate my own at home. I came up with a delicious and easy grain-free granola recipe paired with Meyer lemon yogurt and all the fresh fruit you like! I am also sharing all of the sources for the serving bowls, trays, and linens so you can easily make this for your next event. It is perfect for Easter brunch, a bridal or baby shower, or anytime you are entertaining a crowd. 

I started by making a big batch of my homemade granola (recipe below). I made this granola recipe with this exact yogurt bar in mind so I could control the sweetness against all the other components. It is a great recipe to serve to a crowd since it's gluten and dairy free and lightly sweetened. It's also incredibly amazing served on its own! 

To make the Meyer lemon yogurt, I simply mixed regular plain yogurt with Meyer lemon curd. You can also just serve the plain yogurt and a dish of the Meyer lemon curd so guests can control their own sweetness. I absolutely love the flavor the lemon curd adds!

I pulled out all of my favorite white serving dishes from Bellisimo Decor Store to serve everything in. These dishes are definitely a staple in our house! I use these dishes for everything from food displays to flowers arrangements, and leave out on display in our living room year round. 

To create this look, I used my set of these beautiful wooden trays to put everything on. I then layered the tray with simple linens and all of the white dishes and serving spoons. These wooden trays and linens are also a staple in our house. They make for very easy entertaining!

I used the smaller wooden tray  to place an assortment of napkins and serving dishes and utensils so they were easily accessible to guests.  

It's really fun to let your guests assemble their own bowl to see what kind of creations they come up with! I love to add all of the toppings to mine to get the sweetness from the fruit, slight tartness from the lemon curd and the salty sweet crunch from the granola. 

Whatever upcoming Spring entertaining you have, I hope you give this yogurt bar a try! I would love to know what you think, so be sure to leave a comment below or on my Instagram. Cheers to kicking off the Spring season! 


Grain- Free Granola Recipe

Ingredients:

  • 1 cup cashews
  • 1 cup sunflower seeds, shelled
  • 3/4 cup almonds
  • 1/2 cup unsweetened coconut flakes
  • 1/4 cup coconut oil
  • 1/4 cup honey
  • 1 tsp vanilla
  • 1 tsp Maldon salt, more for sprinkling (optional)

Directions:

  1. Preheat oven to 300 degrees F. Line a baking sheet with parchment paper. Roughly chop the cashews and almonds. In a bowl, combine the cashews, almonds, sunflower seeds and coconut flakes.
  2. In a large microwave-safe bowl, melt the coconut oil, vanilla, and honey together for 40-50 seconds. Add to the nut mixture, and stir to coat.
  3. Spread the mixture out onto the baking sheet and cook for 20-25 minutes, stirring once, until the mixture is lightly browned. Remove from heat. Stir in the salt.
  4. Press the granola mixture together to form a flat, even surface. Cool for about 15 minutes, and then break into chunks. Sprinkle with additional salt (optional). Store in an airtight container or resealable bag.

Source List:

  • White dishes- Bellisimo Decor
  • Wooden Trays- Bellisimo Decor
  • Linens and ramekins- Sur La Table
  • Napkins- Potterybarn
March 06, 2017 /Haley Bell
yogurt, yogurt bar, entertaining, Spring, Shower, Snack, Granola, Granola Recipe, Fruit, Lemon, Meyer Lemon, Healthy
Entertaining, Recipe
Comment

Outdoor Fall Tablescape

October 28, 2016 by Haley Bell

There is nothing more that my husband and I love doing than gathering people around our table. It is the one time you can all come together, away from distractions and truly be present. In this season of gratefulness, I thought I would share an easy tablescape I put together for my sister's birthday. It was simple but it was the perfect setting to celebrate my sister since she happens to love Fall :)

I honestly wasn't planning on blogging about this tablescape but I had some people ask me for some of the sources, so I figured I would pass it along! The inspiration started when I was at the grocery store and spotted a box of these velvet pumpkins tucked away in the back. I had been wanting to get some velvet pumpkins for some time, but I could never find any without a sticker shock! I picked up a few of them and they became the center pieces. This just goes to show, you never know where you'll find something great to decorate with, so always be on the lookout :)

For the lighting, we hung string lights above the table and I also picked up a few of these gorgeous gold votives from Anthropologie. They looked so pretty when they were lit up! I used these cute pouches to put chocolate pumpkins from my favorite store for a little party favor! I always love to give a sweet treat as favors. 

For the flowers, I picked up a bunch of white and green flowers at the store, and then I also took clippings from my yard to fill in the rest. This was a fun way to incorporate our natural surroundings, and also keep the budget down. I kept with the pumpkin theme by placing mini white pumpkins on top of our favorite dishware at each place setting. We kept the napkins simple and glassware with these basic clear tumblers. 

One of my favorite parts of putting this table together was having my little helper you can see in the left hand corner of this picture :) My parents brought over their dog, Tawny, and it was so fun to have her at my feet while I was setting the table. I hope this helps break down an easy and approachable tablescape for all your fall entertaining. I would love to see your festive tablescapes, so be sure to tag me on my Instagram account! 

October 28, 2016 /Haley Bell
Fall entertaining, tablescape, entertaining, home decor, decor, fall, pumpkins
Comment

Love Big: Bridal Shower

May 09, 2016 by Haley Bell in Bridal Shower

I recently had the honor of co-hosting a bridal shower for a good family friend, Kirsten. My husband and his family have been friends with Kirsten and her family since they were babies. When I got married a few years ago Kirsten and her mom and sister threw me the most beautiful shower, so I was so excited to be able to return the favor. She is one of the most bubbly, outgoing and free-spirited people, so I wanted to make sure her shower reflected all those amazing qualities.

The inspiration for the design of the shower came from a couple places. I knew she loved succulents, mercury glass, and colorful flowers with a bohemian flair. Her hashtag for her wedding is #lovebig16, since her new last name is going to be Bigliardi and she's getting married this year. I took all of that inspiration and what we ended up with was traditional meets bohemian. The stationary reflected that with the traditional yet free flowing font we used in both the invitation and the menu. 

We kept the linens very simple and used the flowers as a pop of color. We used a mix of soft petals of ranunculus, peonies and roses which was accented with craspedia and playful greenery including succulents. 

We adorned each place setting with a rosette succulent in mercury glass. We used them as everyone's name card as well as their favor to take home.

We carried out the "Love Big" theme all the way from the stamp on the stationary to the menu. This was such a fun and personal touch that the bride loved! 

We also gifted the bride with this beautiful flower crown that we had custom made for her to wear on her shower day. It was so fun to see her light up when she opened it, and it was such a nice touch to the overall aesthetic. 

Of course I wish I had taken more photos (don't we always say that?) but in looking back at the few that I did take, it was hard to deny how glowing the bride was! My Mother-in-law and I are so grateful we got to throw her a shower and we wish her and her future husband a lifetime of love and happiness. 

Vendors

  • Venue: Menlo Circus Club 
  • Stationary: Elizabeth Phillips
  • Flower crown: Makayla O. Designs
  • Succulents and pots: The Succulent Source 
  • Flowers: Redwood City Florist
  • Envelopes and paper goods: Paper Source
May 09, 2016 /Haley Bell
bridal shower, bridal, boho, traditional, party, shower, flowers, stationary
Bridal Shower
2 Comments

Transitioning Your Home For Winter

January 21, 2016 by Haley Bell

Transitioning out of the holiday season and getting back into the swing of things is something we all go through every year. And when it comes to home decor, there's always the question of what to do once all the holiday decor has been tucked away. I wanted to share some of the winter decor details I used to soften up our space with lots of candles, blankets, and natural elements to get us through the winter months. 

To soften up our space, I used pillows in shades of grays and whites with different textures and patterns so that it was soft on the eye yet soft to the touch. Switching out pillow cases is so simple yet it can completely transform a space. Since most of our time is spent in our great room, I pulled together our favorite soft throws and put them in all areas of our space. Not only do they add to the aesthetic, but we use them all the time :) 

The dining room is not usually an area you would think to add throws to, but it adds a lot to the space. Not only do I love the way it looks, but it is fun to cozy up with during a cold winter morning or evening. 

I also intertwined a lot of natural elements with different white candles. For Christmas this year, my husband gave me a couple Glassybaby votives which I absolutely love! Not only are they beautiful but each one gives back and has a meaning behind it. The votives he gifted me with symbolize Hope, so it is very special every time we light them. 

I also chose to include accents of wood and gold which are carried out with these coasters, walnuts and antlers. 

Lastly, I always like to have a mix of vases and fresh flowers out no matter what season it is. I have these cute bud vases displayed for when the weather starts to hint at Spring, but in the meantime these white flowers will do :)

I hope you have enjoyed some of the decor details I've included in our home this winter. It sure is making these shorter, cozier days much more enjoyable. I would love to hear how you transition during these winter months, so be sure to let me know in the comments :)

January 21, 2016 /Haley Bell
Comment

Sinclair and Moore: Attending The Workshop

July 10, 2015 by Haley Bell

This past April, I had the opportunity to fulfill one of my wildest dreams by attending the Sinclair and Moore workshop in Seattle to learn about event and floral design and business strategy. When you dream about doing something and envision what it would be like, sometimes your expectations are met, sometimes they're not and sometimes your expectations are exceeded. I had no idea what to expect going into this workshop but my expectations were far beyond exceeded. 

I had been following Sinclair and Moore on Instagram and their blog for some time, and last February I was sitting on the couch with my husband scrolling through my Instagram feed when they announced that they were hosting workshops at their studio in Seattle. I immediately looked at him and said, "This would be a dream". I had recently left my full time job to pursue my own passions, and was hungry to learn and grow. To my surprise, my husband had contacted Steve the same night, was blown away by his kindness, and signed me up to attend. There were a lot of happy tears when he told me on Valentine's Day morning that I would be attending the workshop. 

matthewlandstudios-sinclairmoooreworkshop-118.jpg
matthewlandstudios-sinclairmoooreworkshop-014.jpg

As I packed my bags to attend the workshop by myself, I was approaching the next week with an open mind. I am usually a nervous traveler and there was so much unknown going into this week, but there was something different about this trip, and I knew I needed to put all worries aside to truly make the most of this once in a lifetime opportunity.

When I arrived, I was in awe of the Sinclair and Moore studio. It was like walking into a dream. There were buckets upon buckets of the most beautiful flowers, ribbons of all shades and textures, urns, vases and compotes lining the open shelving units. The most friendly hosts, attendees and Steve and Jamie's adorable little baby boy Greyson, filled the room with laugher and excitement.  

matthewlandstudios-sinclairmoooreworkshop-020.jpg
matthewlandstudios-sinclairmoooreworkshop-002.jpg

We were welcomed into the "classroom" with a personalized box of all of Steve's favorite things. The box itself was inspiring (pictured above), and such a reflection of him and their beautiful brand they have created. Not only did Steve carefully source the most beautiful flowers and gift items for all the attendees, but I was impressed by all of the business materials and sourcing lists he put together for us. Each day was spent half in the "classroom" learning about business and design strategy and the other half was hands on learning putting together flower arrangements. It was the perfect balance. 

matthewlandstudios-sinclairmoooreworkshop-111.jpg
matthewlandstudios-sinclairmoooreworkshop-037.jpg

From the very beginning, Steve made everyone feel welcome and at home. He also leveled the playing field so that everyone felt comfortable no matter what their background and skills were, and all he asked was that we were open to learning and not competitive. From that moment on, what transpired  amongst the group was magical.

matthewlandstudios-sinclairmoooreworkshop-131.jpg
matthewlandstudios-sinclairmoooreworkshop-181.jpg

Steve's team was also so encouraging throughout the week including Marianne Caldwell of  RiverOaks Charleston, Melanie Benson of Melanie Benson Floral and these beautiful images I'm sharing captured by the amazing Matthew Land photography. They all shared their passion and skills and all became like family to us. 

There were a handful of women, including myself, that had never put together a flower arrangement, and by the end of the workshop we knew how to make a compote arrangement, a bridal bouquet, and a large floral arrangement. I was in complete awe that we could learn these skills within a matter of days, but we did and it was the most inspiring feeling! I really appreciated Steve's unconventional approach to teaching, which allowed our creativity and style to shine through. No two arrangements were the same. 

Outside of the studio, friendships were formed and bonds were created. It's not every day that you get to meet other like minded individuals with shared goals, all supporting one another in their journey. Steve and Jamie also invited us into their home on the last night for dinner, and it was so incredibly special. We talked, laughed for hours and ate the most amazing chocolate and peanut butter cake from Deru Market. Our week was concluded with a one-on-one mentoring session with Steve and it was so inspiring to sit down and review goals and put an action plan into place.  I experienced a lot of personal and professional growth during my time in Seattle, and it was very therapeutic for me. By the end of the week, we all felt like family, which made it very hard to pack our bags and head home.

It is hard to believe it has been over 2 months since the workshop, and it is also hard to describe what an impact it has had on me.  If you ever have the chance to attend one of their workshops, I encourage you to make the investments in yourself. I have never been so refreshed, motivated and inspired to pursue my goals.

The continued support from Steve and the women I met has been so incredibly humbling. Since our time together, I have been busy putting everything I learned into practice and working behind the scenes on my business plan. I believe that everything happens for a reason and I know that this whole experience happened for so many reasons. I look forward to sharing more details with you as my journey unfolds :)

" The future belongs to those who believe in the beauty of their dreams." - Eleanor Roosevelt

Photography: Matthew Land Photogrpahy

July 10, 2015 /Haley Bell
3 Comments

Peach Inspired Summer Tablescape

June 07, 2015 by Haley Bell

One of the things I love most about Summer drawing near is that the evenings are getting longer which allows for more time to entertain and enjoy company. I recently attended the Sinclair and Moore event design workshop and I wanted to take what I learned and put together a special tablescape and flower arrangement for my husband and I to enjoy for a Summer evening in. 

Flower-8.jpg
Flower-3.jpg

My inspiration came from the first crop of beautiful peaches, nectarines and lemons that we had in our kitchen. I couldn't pass up an opportunity to include them in the design. They also inspired the colorscheme for the flowers. I included lots of whites and greens accented with yellow and coral colored tulips which gave the table a nice cohesive look. I kept the linens light with a simple blue striped table runner, crisp white linen napkins and an off-white linen pouch for our silverware. 

Flower-10.jpg
Flower-9.jpg

Keeping the table design simple yet elegant allowed for casual conversation to linger over our wine and enjoy a nice meal together. It also reminded us of our trip to France last year where we were so inspired by the decor and the amazing food and wine there. 

View fullsize Flower-5.jpg
View fullsize Flower-11.jpg
View fullsize Flower-6.jpg

My favorite nights with my husband are when we are simply at home together, enjoying a nice meal. I look forward to many more of these Summer evenings ahead! 

Get the look!

  • Table Runner- Cost Plus World Market
  • Marble Cutting board- Cost Plus World Market (in-store only)
  • Crystal Cake stand- similar- Macy's Home
  • Linen Pouches- similar- Container Store 
June 07, 2015 /Haley Bell
2 Comments

Preparing Your Home for a Party

April 24, 2015 by Haley Bell

I get asked all the time what I do to prepare for parties, whether it is an intimate dinner party or larger gathering. When I first started entertaining, I would get stressed out about it and feeling like I had to do it all. The truth is that your guests would rather have a host enjoying themselves than one that made everything perfect. Over the years my husband and I have found a passion for opening our home to others and by doing so we have gotten in a groove of preparing for parties. These are steps and tips that have helped us, and ones we naturally do every time we have company over, so I hope you find these helpful! 


The Day Before The Party

  1. Set your table(s). This includes your dishes, flatware and glassware, flowers, and décor.  
  2.  Pick out and wash your serving platters and glassware for all the appetizers and any cocktails you’ll be serving. 
  3. Chill your beverages that need to be refrigerated (mixers, sparkling waters, white wine, etc.) so all you have to do is pop them in an ice bucket right before guests arrive.
  4. Make the dessert(s) or pick them up from the bakery the morning of your party.
  5. Go to the grocery store and prep all of the food in advance. Try to select menu items that are easy to make for a big crowd (even if it is only 4-6 guests) and make as much of it ahead of time as possible. If you are doing a potluck, let your guests know what they should bring in advance.
  6. Tidy up the house. You don’t have to go overboard but just make it an inviting space (or have the cleaners come!). 
Dinner Party Prep-4.jpg
Dinner Party Prep-3.jpg
Dinner Party Prep-2.jpg
Dinner Party Prep-1.jpg

The Day of the Party 

  1. Run the dishwasher and unload it. Trust me on this one. You don’t realize how many dishes you go through, and this allows you to throw everything back in the dishwasher for easy clean up after the party.
  2. Take out the trash. You go through a lot of trash when you have guests over and you don't want to have to take out the trash in the middle of your party. 
  3. Leave yourself some time to kick up your feet to relax. Use this time to take a nap, get showered, changed, etc. so you are fully present and enjoy your own party. The vibe you put off is the vibe of the party so make it a good one!
  4. Assemble the bar and all the appetizers.
  5. Set the mood. Light some candles, turn on some music and pop some wine open. 
  6.  Put your party shoes on and have fun! 

 I hope you find these tips helpful the next time you host a party! Comment below with your best tips :) 

April 24, 2015 /Haley Bell
entertaining, party, party prep, home
Comment

Spring Table Setting

April 01, 2015 by Haley Bell

Ah, Spring is in the air! And with Easter being this weekend, so is Spring entertaining. I love to entertain and host but pulling together a beautiful tablescape can feel a bit daunting at times. That's why I am breaking down exactly how to achieve this Spring table setting. 

Whenever I am dreaming up a tablescape, I like to think about the basics: my theme and colors, the main centerpiece, what dishes, silverware and glassware I want to use, and linens (table cloth, table runner, napkins, etc). Once you have those basics nailed down, then you can get creative with all the fun accessories. I also try to use as many items that I have hand as possible, while mixing in some seasonal items I can shop for online, in an antique store or that I can find at the local store. 

Easter Pics-Easter Pics-0001.jpg
Easter Pics-Easter Pics-0004.jpg
Easter Pics-Easter Pics-0006.jpg
Easter Pics-Easter Pics-0005.jpg

The first step is to lay your table runner down and put the wooden tray on top. Gather all of your glass bottles and put them down the center of your wooden tray. Next you will arrange your assorted Spring flowers. I clustered the flowers together according to color so all of the white flowers were mixed together and all of the yellow. Just cut 1/2 in. off the bottoms of the stems, add water to the vases/jars and arrange them however you'd like. 

Easter Pics-Easter Pics-0010.jpg
Easter Pics-Easter Pics-0014 (1).jpg

The second Step is to actually set the table starting with laying down your chargers on the bottom and layering on your plates and bowls depending on how many courses you will be serving. On top of the plate,  place your napkin and 1 sprig of thyme. Lastly, add your utensils and glassware. I am serving mimosa's so I used crystal goblets. I am only serving 1 main course, so I only needed 1 plate and 1 fork and knife but set your table accordingly.  

Easter Pics-Easter Pics-0013.jpg
Easter Pics-Easter Pics-0016.jpg

The third step is to add any of your accessories. Here I added a little drink caddy with mixed juices for the mimosa's and a coffee canister. Depending on your menu, you could add a basket of assorted breads and pastries with a cute butter dish and jams. Use your imagination and make it your own! One thing I try to stay away from is adding too much clutter to the table since you want your guests to feel comfortable and not overcrowded. 

I hope these tips are helpful to you as you go about setting your tables for Spring! I would love to see your tables, so be sure to tag me on Instagram!


To achieve this look, you will need:

  • White table runner
  • Wooden dough bowl or wooden tray
  • Assorted glass bottles/vases (I used 5 glass jars and bottles I had around the house)
  • A set of Chargers
  • A set of white or cream plates (and bowls, if needed)
  • A set of napkins
  • A set of silverware 
  • A set of glassware
  • Assorted white and yellow Spring flowers (I used 4 small bundles of  yellow daffodils, 1 bundle of white tulips and 1 bundle of white ranunculus from Trader Joe's)
  • Sprigs of thyme (from the grocery store)

Photo Edits: Twenty8 Moments Photography 

April 01, 2015 /Haley Bell
2 Comments
SpringHostessGift

Spring Hostess Gift

March 31, 2015 by Haley Bell

Are you like me where you hate showing up to Easter or Spring events empty handed but you're sick of settling for a potted plant or See's Candy? Don't get me wrong, I love both of those options but sometimes I want to gift something with a little more thought. I took my homemade Meyer lemon curd recipe and turned it into a gift any host would be excited to receive. 

SpringHostessGift1

For each gift, I took one of these  white porcelain berry baskets and lined it with a grey and yellow striped cloth napkin and set 1 jar of the Meyer lemon curd in it. I also added a mini pound cake loaf wrapped in parchment paper and tied with my favorite twine. You could also add scones, shortbread cookies, a mini bouquet of flowers (white hydrangeas, daffodils or tulips) or a mini bag of coffee to add to it. You can make this as simple or fancy as you would like! But, one thing is for sure, you will most definitely be invited back! 

SpringHostessGift2

Sources

  • White berry basket: Shop Sweet Lulu 
  • White and gray striped napkin: Sur La Table 
  • Glass weck jar (.5 Liter): Amazon
  • Cotton twine: Shop Sweet Lulu 
  • Gold scissors:
March 31, 2015 /Haley Bell
Comment
Photo Credit: Twenty8 Moments Phototography

Photo Credit: Twenty8 Moments Phototography

A Very Special Bridal Shower

March 24, 2015 by Haley Bell

Last Spring my Mom, Sister and I had the honor or throwing a very special someone a bridal shower. This special someone's name is Meagan, and we have been the best of friends since Kindergarten. You see, Meg and I had always dreamed about our weddings as little girls. And we always knew we would be in each others weddings. And as fate would have it, we got married within a year of each other. That meant a lot of wedding fun between the two of us! 

Meg is the type of person who loves a good party that includes a fun atmosphere, lots of colorful decor amongst good family and friends! Growing up, we had countless celebrations together, but I wanted to make sure this one was extra special. 

View fullsize Shower_Invite.jpg
View fullsize Bridal_Shower10.jpg

Our theme was black and white with pops of pink, green, and orange. We carried the theme out from the beginning with the invitations through the end with the favors. Planning this shower made me go out of my go-to "neutral" color scheme and have some fun with color! 

View fullsize Shower_Table3.jpg
View fullsize BridalShower2.jpg
View fullsize Bridal_Shower6.jpg
View fullsize BridalShower3.jpg

On the menu: Salad sampler with cobb, fruit and Chinese chicken salad, and ice cream sundaes for dessert. 

The tabletops were lined with black and white striped runners, topped with mixed flower arrangements we put together, and colorful confetti we made out of tissue paper. Since the tabletops were so busy, we stuck with plain white dishes topped with these adorable menus that matched the invitations. My Mom made the name "cards" which were hand sewn pouches with their names painted in gold on them. 

View fullsize SHower_Table.jpg
View fullsize Bridalshower.jpg

To add a personal touch, we placed black and white picture frames throughout the room that included baby pictures, friends and family and engagement pictures. Instead of traditional party favors, all of the ladies got to "choose" their favorite shade of pink and orange Essie nail polish to take home.

View fullsize Shower_Favor.jpg
View fullsize Shower_Favor2.jpg

Per the request of the bride, we opted out of playing any bridal shower games and focused on enjoying good company, food and showering Meg with lots of love and gifts!

The best part of the day was celebrating a friend whom I've seen through every milestone in life amongst her most coveted female friends and family. I wish Meg and Kyle nothing but the best in their future together!

Party Planning Tip: Don't wait until the day before (or day of) to make all of your DIY crafts. We made all the heart pouches, confetti, printed the menus, etc. ahead of time. The only thing we had to do at the end was arrange the flowers, the balloons and tabletops. As the Host, this allows you to actually enjoy the party without feeling stressed :)

Vendors:

  • Venue and catering: Menlo Park Circus Club
  • Designer: Haley Bell 
  • Photographer: Shannon Harris, Twenty8 Moments Photography
  • Invitations, menus, favor sign: Elizabeth Marie, EM Design Shop
  • Paper confetti: assorted tissue paper and hole punch, Michaels
  • Table Runners: Exclusive Elements
  • Favors: Essie Nail Polish
  • "Name" heart pouches: Pam Harris
  • Balloons, paper straws, heart sparkling candle: Shop Sweet Lulu


March 24, 2015 /Haley Bell
6 Comments