
Homemade Raspberry Marshmallows
I had never tried making homemade marshmallows before, and now I am fairly certain I can never go back to store bought again! The inspiration for these marshmallows came from a recent hotel stay where my husband and I ordered the most amazing ice cream sundae. The sundae had layers of ice cream, brownies and homemade marshmallows. We both loved the marshmallows, and I knew I needed to recreate them at home. I decided to take it a step further and create raspberry marshmallows which turned out amazing! They are incredible on their own, in hot coco, in ice cream sundaes, s'mores, and the list goes on and on!

I think one of the most surprising things about making homemade marshmallows, was finding out how easy they are to make. There are a couple of steps involved, but they come together rather quickly. And, they keep for a couple of weeks, so it's worth the effort.


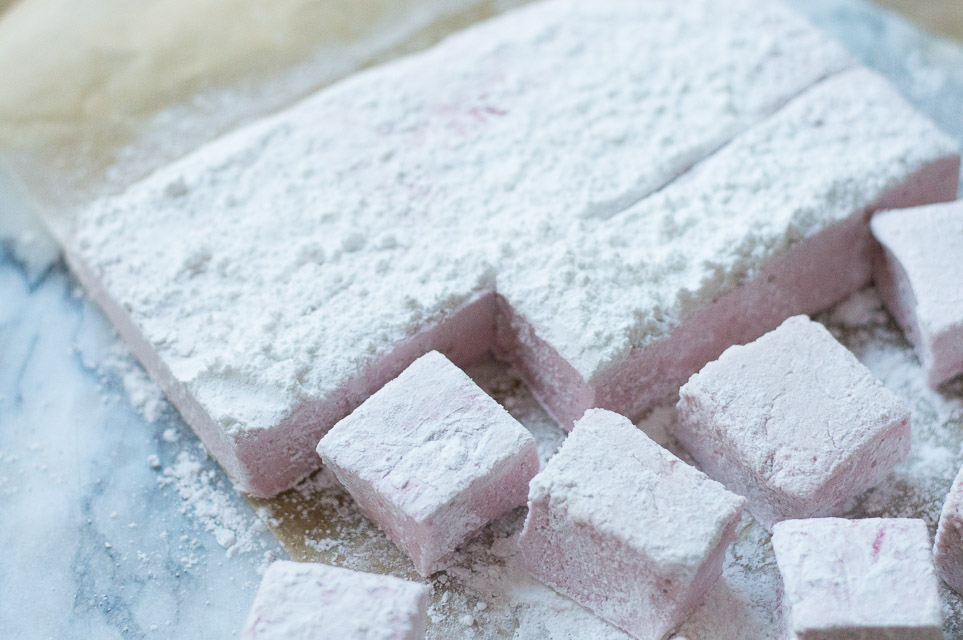
I love the more rustic look of the marshmallow's, so I used scissors (that were clean!) to cut them in strips and then into cubes. I also chose to use an 8x8 pan to make thicker marshmallows, and I loved how they turned out.

I chose to use fresh raspberries (frozen would also work) instead of freeze dried, and my husband and I both loved how you could taste the natural flavor of the raspberries. It was the perfect amount of sweetness without being too over powering. It also turned them a pretty light pink color and gave it a marbling effect!

We will be making these again and again! We can't wait to try these out this summer while sitting around a fire making s'mores. I would love to know what you think of the recipe, so be sure to comment below or on my Instagram :)
Homemade Raspberry Marshmallows Recipe
Ingredients:
- 3 packages unflavored gelatin
- 1 cup ice cold water, divided
- 1 ½ cups granulated sugar
- 1 cup light corn syrup
- ¼ teaspoon kosher salt
- 1 teaspoon vanilla extract
- ¼ cup confectioners’ sugar
- ¼ cup cornstarch or arrowroot powder
Raspberry Puree:
- 1 cup fresh raspberries, washed
- 1 tablespoon granulated sugar
- pinch of salt
Directions:
- To make the raspberry puree, add the raspberries, sugar and salt to high speed blender or food processor. Blend until smooth. Strain the puree through a fine mesh sieve to remove the seeds and then set aside. You should have about a heaping ⅓ cup of raspberry puree.
- To make the marshmallows, add the gelatin and ½ cup of the ice cold water to the bowl of a stand mixer fitted with the whisk attachment.
- In a small saucepan, add the remaining ½ cup water, granulated sugar, corn syrup and salt. Place the pan over medium high heat and cover with lid. Allow the mixture to cook for 3 to 4 minutes. Remove the lid and attach a candy thermometer to the pan. Cook until the mixture reaches 240 degrees. Immediately remove from the heat.
- Turn your stand mixer on low speed and while running, slowly (and carefully) pour in the hot mixture in a stream down the side of the bowl. Once all the liquid is added, increase the mixer speed to high. Continue to whip for about 12 to 15 minutes, until the mixture is very thick and lukewarm. During the last minute of whipping, add in the vanilla extract and raspberry puree (start with the mixer on low and then increase again to high once incorporated).
- Meanwhile, while the mixture is whipping, whisk together the confectioners’ sugar and cornstarch in a small bowl. Lightly spray a 8 by 8 inch baking dish with nonstick cooking spray. Generously coat the bottom and sides of the pan with a dusting of the confectioners’ sugar mixture, reserving the rest for later.
- When the marshmallow mixture is ready, pour into the prepared dish and use a lightly greased spatula to spread evenly in the pan. Sprinkle the top generously with the confectioners’ sugar mixture, using enough for it to be lightly covered. Let the marshmallows sit uncovered at room temperature for at least four hours (and up to overnight).
- Gently remove the marshmallow from the pan and place on a cutting board. Using a pizza wheel or scissors dusted with the confectioners’ sugar mixture, cut into 1-inch squares. Once cut, lightly dust all the sides of each marshmallow with the confectioners’ sugar mixture (making more if needed) to prevent them from sticking. Store the marshmallows in an airtight container for up to 3 weeks.